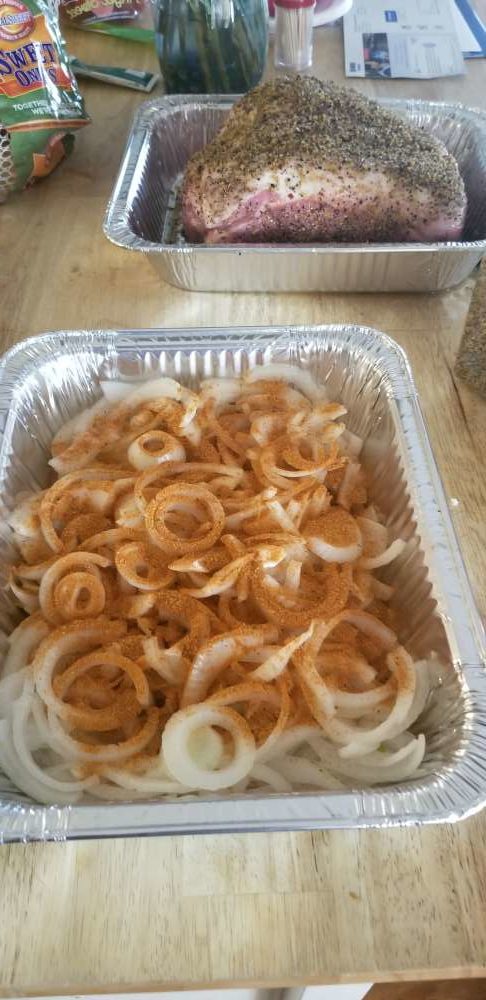
Foil Roaster Pan with a Layer of Onions
What is the best way to make awesome, mouth-watering, pulled pork? Something extra special, that would surely be the talk of any get together?
Talk to 10 different BBQ experts and you will most likely have 15 or more different opinions! Patios, decks and kitchens is where controversy abounds on this topic. For example, do we use a drip pan with apple juice vs drip pan with cola or carbonated beverage, fat cap up vs fat cap down, to inject or not to inject, what type of wood to use? We could go on and on. Here’s the good news, though: there’s a very high probability the results from any of these methods are going to be absolutely delicious!
I’m not going to get into the debate as to which method or technical approach is better. I want to simply pass along the way I prepare pulled pork. It’s probably a combination of ideas shared by BBQ enthusiasts, trial and error on my part and a healthy dose of “Wow, I wonder what would happen If I tried this?”.
I must admit I was somewhat reluctant to try pulled pork at first. Mostly because I had the misguided impression that it was time consuming and complicated. My efforts in the past seemed to be mostly ground up pork smothered in a sweet BBQ sauce. I was on a trip to the South and tried a pulled pork sandwich. That meal began my personal journey of perfecting my own method.
Now I will say, for full disclosure sake, that I am partial to ceramic cookers. However, I’m convinced this method will work on many other types of grills & smokers. I’m also a little old school in my approach. That is, I really prefer the wood smoke taste in my BBQ rather than results from a crock-pot, however tender it may be.
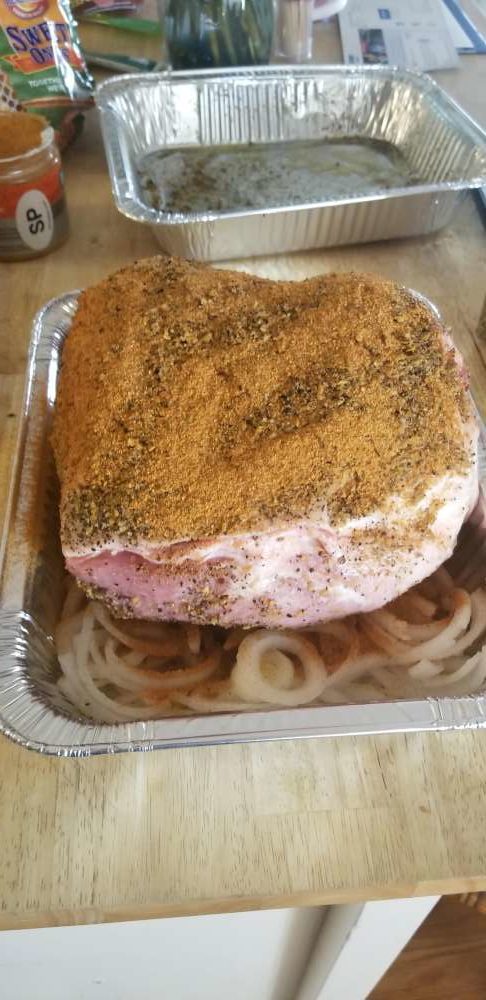
The seasoned pork butt is then laid directly on this layer of onions.
The second turning point came from a conversation with a co-worker and friend from Ohio, Woody Markus. Woody’s method of smoking the pork butt on a bed of sliced sweet onions is now a major part of my BBQ style. Woody is really the one who deserves the credit for improving this method of cooking pork butts.
Enough of an introduction, let’s get on to the BBQ! I’m sharing my preferred methods here. You should feel free to take these, improvise and come up with other creative ideas! I prefer the bone-in shoulder, typically between nine and eleven pounds. I start by rinsing the piece of meat well with cold water, pat dry with paper towels and rub liberally with olive oil. Then, I’ll use my seasoning of choice, often Montreal Steak Seasoning. If I’m looking for a sweeter product that still has some BBQ tang, I’ll use McCormick’s Brown Sugar Bourbon . . . . my wife’s favorite! Regardless of the seasoning, I’ll usually add some of Weber’s Smoky Brown Sugar rub as well.
Start with a foil roaster pan. Take 3 or 4 sweet onions and slice them thin. Lay the onion slices in the bottom of the roaster pan to make approximately a 1.5” to 2.5” layer of onions. The seasoned pork butt is then laid directly on this layer of onions. Place the pan on the grill. My preferred temperature for cooking is around 225°F. Cook time is normally between 10 to 12 hours.
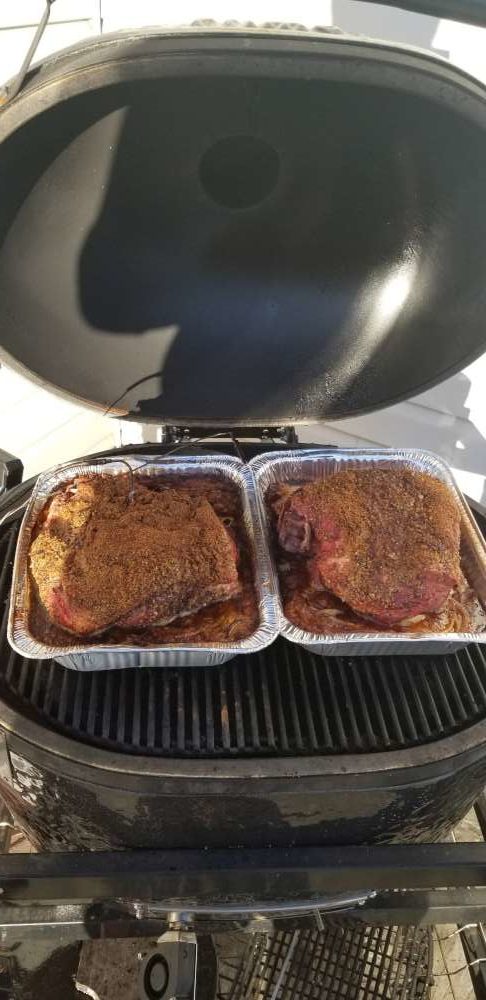
Place the pan on the grill.
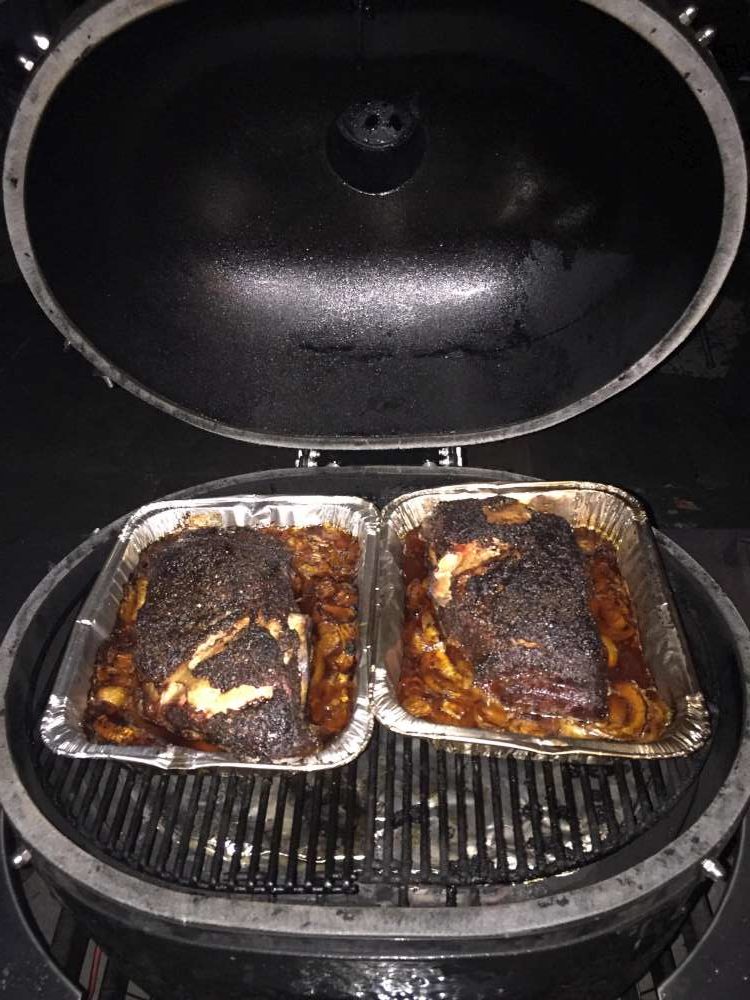
I cook more to internal temperature than I do timing. My goal is to take the meat to around 190 to 195°F, internal temperature. The infamous “stall” technique may come in to play here. If your temperature of the meat doesn’t seem to be increasing much, don’t despair! Just maintain the course and the internal temperature will eventually climb to that 190 – 195°F range.
When the meat is done, cover the entire pan with several layers of heavy-duty aluminum foil. Then, allow it to stay on the grill for at least another hour. By covering it at 190 – 195°F and letting it sit, the internal temps will rise to 205 – 210°F. In the past, I have let it rest for three or four hours. I admit that patience is difficult, but you’re rewarded with an unbelievable flavor. What fabulous, great pulled pork!
A ceramic grill will easily stay hot during this resting period. If you’re cooking with a pellet or gas grill, when the meat gets to temperature, keep the grill on for this period. Just turn the temperature down as low as you can.
The next step is uncovering the meat and begin to pull the pork. I’ve talked to many people who remove the butt from the pan and chop the meat. I prefer to hand pull the meat so that I’m able to pick out large clumps of fat. I cook with the fat cap on, so I begin by scraping the fat cap off the top. Then simply pull the meat and let it fall back into the onion juice in the pan. The onions will have caramelized and mostly disintegrated by this point. Simply toss the pulled pork in this wonderful combination . . . . you may not even need BBQ sauce! Add some coleslaw or any other of your favorites and you will have pulled pork sandwiches that are absolutely out of this world! Enjoy my friends, enjoy.
Recipe Recap:
- 1 Pork Shoulder with the fat cap
- 3 to 4 Sweet Onions – sliced thin
- Olive Oil to rub the meat before the cook
- Montreal Steak Spices or McCormick Brown Sugar Bourbon Spice to rub the meat
Steps to follow:
- Place the sliced onion in your roaster pan.
- After cleaning the Pork Shoulder, rub it with the Olive Oil
- Apply the Spice on the ‘oiled’ Pork Shoulder.
- Place the Shoulder onto the sliced onions
- Set the Grill Temperature at 225F
- Cook for 10-12 hours, until internal Pork Shoulder temperature hits 195F
- Then use aluminum foil to cover the pan as tight as possible.
- Turn off the air control on your Kamado Grill, or lower the temp as low as possible if you’re using a gas or pellet grill.
- Let it rest on the grill for at least an hour and the internal temperature will rise to 205F to 210F. If you have time, it can rest as is for 3-4 hours.
- Pull the pork directly into the onion juice and toss.
- Taste, eat, and if any left, serve to your guests!